Listen to this article in audio form! It’s #11 in the Team Roping Tips Podcast.
For the latest episodes subscribe on iTunes or your favorite podcast app.
We’ve all heard that “practice makes perfect,” but how perfect is your practice? Do you have tools that give you the opportunity for perfect practice, and are you using them consistently, and most importantly – in ways that really constitute “perfect?”
“Perfect practice” requires awareness, conscious planning and execution of specific adjustments to promote growth in our horsemanship and roping fundamentals.
I don’t have to tell you that team roping is a very dynamic event and requires us to make decisions and changes in a split second. The type, frequency and quality of our practice can make or break us in competition.
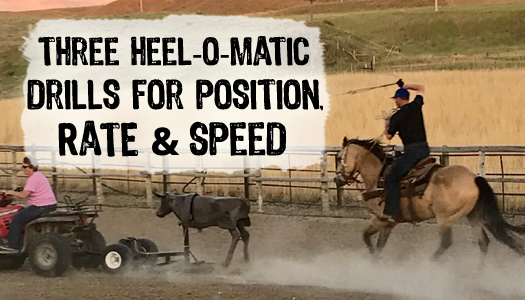
Fortunately, as team roping has grown so rapidly, the quality of practice tools has also evolved, allowing ropers to get more correct and consistent practice. In my own opinion, the evolution of the roping sleds has been one of the biggest reason why ropings have become so competitive. Not all roping sleds are created equally however, and not all brands continue to evolve quite like Heel-o-Matic.
The days of just making four clean runs to almost guarantee you a win are not as common now. To win most ropings these days we must be much more aggressive. By using a Heel-o-Matic roping sled to solidify our horse’s training and our roping techniques, we can build confidence in our skills and can be better prepared to handle any situation that comes our way in competition.
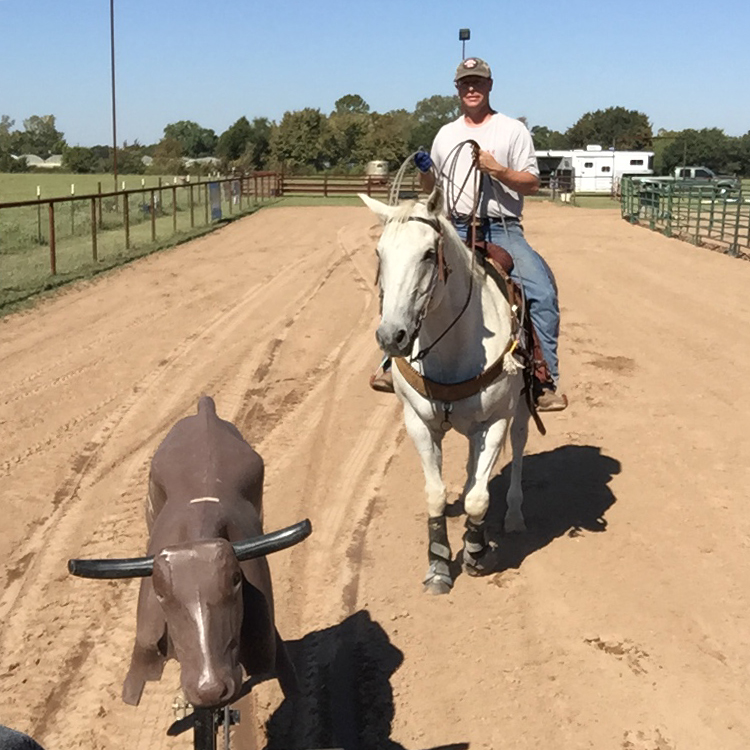
With all the different roping sleds on the market, Heel-o-Matic continues to be in a class by themselves. They’ve not only been a forerunner in the industry for many years, but they are incredibly durable, lightweight, and offer the most realistic practice you can get.
This is in large part thanks to the countless hours of research and development to replicate the movements of a real steer down the exact timing of the hop. Heel-O-Matic roping sleds are also designed in a way to eliminate vertical movement when being pulled by an ATV. I also really appreciate that the head turns when you put pressure on it when you dally.
So why invest in a Heel-O-Matic roping sled?
Although roping live steers offers us the similar unpredictability we’re sure to face in competition, when it comes to maximizing our time and financial investment, nothing quite compares to the quality of practice, and the quickness in which we can get it with a Heel-o-matic, as compared to gathering and wrapping steers, not to mention coordinating friends, neighbors and partners to rope.
There is actually great benefit in the predictability a roping sled offers for young ropers or those just learning, especially in the beginning when it’s critical to establish positive, consistent movement patterns. When we develop good habits in the early stages, it can dramatically fast forward our success when it’s time to enter.
Developing proper muscle memory from the start increases our odds for success and limits the changes and adjustments we’ll need to make to our roping as we go, essentially making the process much more fun and enjoyable.
You could say the same goes for young rope horses. If we have the ability to make the training process easy and stress free, we want to jump at that opportunity to accelerate the learning curve and set our valuable horses up for a successful career.
Speaking of long, successful careers, the ability to rope the equivalent number of live steers to learn the same skills would take a much, much longer time and increase the wear and tear on our horses, potentially shortening their careers. In addition, not always having the pressure of roping live steers means less mental stress for our horses, making them easier to maintain and emotionally as well.
There’s no question that the list of benefits available from practicing with a Heel-o-Matic roping sled is a long one! To further set you up for success, I’ll be sharing a few drills I’ve found to be a game changer for my horses and I. Remember, it’s not just practice that helps us maximize our roping, but using specific tools while consciously and deliberately practicing with a purpose.
Drill #1 for POSITION
The position of our horse is critical to the success of our run. When I use the word “position,” I not only mean the position of our horse’s feet, but also the specific shape and weight balance of their body.
If at any point our horse is too close, too far back, too far to the left, or too far to the right, then often times we’ll find that our horse’s position (or lack of it) forces us to take a throw that is not ideal. Of course we want and need the ability to place our horse’s body anywhere, any time in a split second. When our horses are truly broke (something we want to establish before we ever consider roping a steer on them), we should have the ability to do that.
Having to make unnecessary movements to redirect our horse in a run, no matter how subtle, is essentially going to slow us down. While we do need the ability to immediately correct course and make adjustments, our horses also need to understand and take responsibility for correct position on their own so that any adjustments can be minimized. Thankfully with the Heel-o-matic we can achieve both qualities.
I want my horses to be responsible for keeping the correct width and distance from the steer. This applies whether we’re initially training a head or heel horse, or filling in some gaps for horses who are already seasoned. You’d be surprised by how many “finished” rope horses do not have very refined maneuverability in a run, but were also never taught to take full responsibility for position.
Again we need both qualities, in fact close to equal degrees of each. If I were to establish a responsiveness/responsibility ratio, I would want just a hair more responsiveness than responsibility so that my horse knows his job, but isn’t making assumptions to the degree that I can’t very quickly influence his body in a run.
To instill responsiveness, I’ll want to make sure that’s established well first before doing Heel-o-matic drills. For more on this topic, listen to Team Roping Tips Podcast Episode Six or check out the article titled Five Fundamentals for Precise Loop Placement and More Consistent Catches at CraigSmithTeamRoping.com.
To instill responsibility with help from a Heel-o-matic, I’ll have the person pulling the Heel-O-Matic drive down the arena. I’ll ask my horse to get into the position I want him in and just follow it for a ways with the intention that once in position, my horse maintains the ideal position.
I prefer my head horse’s head no closer than the steer’s tail and to the left approximately five feet. As for heel horses, I like them to have their head just a little bit behind the steer and about ten feet to the right. This is important since correct position gives me the best sight picture of my target in a run. We can’t catch what we can’t see.
Everyone has a different comfort level when it comes to their sweet spot to rope. The key is not to get too close, as this can affect our swing, make our delivery more difficult, or possibly put us in the middle of a wreck if a steer were to cut in front of us.
When my horse stays in the correct position for a period of time, I’ll reward them by stopping (as well as the sled) and allowing them a rest break. The down time isn’t just for them to catch their air, but more for processing what we’re practicing. What gets rewarded, gets repeated. If there’s no incentive for our horse to be present as a partner, we can’t expect them to really show up for us and want to offer their best. Before continuing on, I’ll look for a sign such as licking their lips or blowing out, and then we’ll do it again.
If my horse slow down and gets too far away from the Heel-o-matic, I’ll use my legs to correct him to get back into position and then put him back on his honor. I don’t want to have to hold or constantly ask my horse to stay in position. On the other hand, if I have a horse that is speeding up, I would sit more in my seat and lower the energy in my body, which is the cue to slow down. I bring in my reins if the initial cue with my body language to back off is ineffective. If my horse is too far either to the left or right, then I’m going to use my leg and put pressure right behind my front cinch to move them over.
The horse’s age and/or experience will influence the amount of time I spend asking them to get into position and when I reward them. I would give more time to a horse that is in the learn stage to get into the position I want, being more passively persistent, whereas I would expect a more experienced horse to respond quicker.
We don’t want to expect younger horses, or more experienced horses that need help in this area, to be perfect right from the start. It’s important to give them the opportunity to figure it out for themselves and let their mental wheels turn, and then guide or correct them when they need assistance. Reward them quickly when the get into position and allow them extra time to soak. Lower your expectations if necessary, and always appreciate the solid efforts horses make. in the beginning especially. Remember, this time of learning (or even re-learning) is critical for these new lessons to really “stick.”
Again, we want to give our horse’s the benefit of the doubt by making sure we can quickly and easily maneuver them easily before we consider performing drills with a roping sled. When you’ve allowed them some time to understand what you want on the Heel-o-Matic, you’ll eventually want to be pretty quick and firm with your leg, and very obvious with the release. This motivates your horse to be correct and makes it as clear as possible where the most comfortable place to be is.
To even further refine responsibility and test experienced horses, I follow the Heel-o-Matic, but ask the driver to randomly veer to the left and right to add some unpredictability, and also increase and decrease speed more often.
When the sled changes direction or speed, it’s important that my horse hustles to keep that position. Again, if necessary, be sure to primarily use your legs, instead of your hands, to motivate your horse to “hunt” the comfort of the correct position. It’s got to be more uncomfortable not to.
When your horse is taking more responsibility, and doesn’t require as intense focus on riding, feel free to incorporate your rope into this drill by swinging it as your follow the sled but don’t rope it. The purpose of this drill is to teach our horse the correct position and expect them to honor that position on their own throughout the run.
This may be one of the easiest exercises to do but is also one of the most overlooked. It’s not just what we do, but how. Success is in the details.
Drill #2 for RATE
Another drill that I like to implement with the Heel-O-Matic is to establish more rate. It’s another key aspect of our horse having the responsibility to maintain position as the speed of a steer changes or when we want to make our throw. But again, by “rate,” I don’t just mean not getting too close to the steer, but actually creating the proper mental state and practicing the physical biomechanics in our horse’s body that are necessary to make rating easy.
After all, a horse who is mentally present, knows his job and is thinking about performing it in the moment with you, and is preparing his body to do so, that will have reliable rate. Often times, a horse that lacks rate is just following their mind, which is not really in the game to begin with. If we don’t have our horse’s brain present and working with and for us, it won’t matter so much how much repetition we offer and go through the motions physically, it won’t quite create the results we’re after.
This topic reminds me of the other day when I was riding in a new vehicle that has variable cruise control based on traffic in front of it. Once you set the desired speed, the vehicle will automatically slow down when it gets too close to a vehicle in front of you, and then pick back up speed once it has the required space. This is a great example of the rate I want in my horse, it’s automatic and the horse has all the parts in place and requirements to make it easy.
To work on teaching a horse rate or improving rate, get your horse into position from drill #1 and have the person pulling the sled slow down or stop. I would suggest starting out at a slow pace and build up as our horse progresses, both in each session and over time as your horse learns. It’s important that as the sled stops or slows down, that our horse mimic the sled and maintain distance on their own. The more your horse has had trouble with this, the bigger deal we make out of it when they start rating on their own – with longer and more meaningful rewards and rest breaks.
In the early stages we may have to assist our horse by cueing them to stop or back off. Even consider backing them quite a distance so they realize that going past a certain point is a “no go” zone. Again, try to avoid using your reins only (or first), and instead primarily and initially use your body language – your weight and seat to cue them. It’s critical that when we do use our hands, that it comes at least a split second after using our seat and weight. Our horses will only learn to respond to more subtle body language if we use it. I use my reins and legs, not to make my horse stop and go necessarily, but if my horse doesn’t stop or go based on the cues I apply first with my seat/weight/life and energy.
Again, reward your horse by offering them a rest for a job well done then look for a sign of relaxation as lip licking or blowing out before continuing. I can’t stress enough that it’s the release that teaches – if you forfeit your horse this comfort, their learning will be not only delayed but superficial at best. When more “soak” time and less repetition, you can accomplish twice as much in half the time, equaling less wear & tear on your horses.
Only as our horse begins to get a firm grasp on rate, would we then turn up the intensity or speed. It is common as we turn up the speed to sometimes need to revert to slower speeds to confirm the early education we’ve already instilled.
This drill is beneficial for “chargey” horses, but keep in mind that in order for our horse to really think, his emotions must be balanced. As we implement this drill we can address this aspect as well, in fact we must make it a priority. Our horses get better at what they practice, so use this opportunity to offer plenty of relaxed rest time for a horse that tends to get anxious or tense. You’ll be amazed how camping on them between rounds on the Heel-o-matic and doing “nothing” can really transform them from the inside out.
Horses that get “short” or duck out can really benefit from the Heel-O-Matic work to free up their body and mind as well. It’s all about bringing that responsiveness/responsibility ratio into balance and making sure that they are taking responsibility to do things correctly and with good timing (not anticipating).
We can do this by following the sled for a little longer distance, being mindful that we want our horse listening to us, and never dictating to us when to throw. After you rope, keep following the Heel-o-Matic until your horse shows a sign of relaxation, and then stop straight to allow them time to process the learning opportunity. We want to counter-condition the habit of making assumtions by staying with the Heel-o-matic and going straighter, longer and doing so with plenty of relaxation and repetition.

You can do this starting off at a walk and as your horse progresses, begin to add speed with a trot next, followed by a lope. Again, don’t be afraid to mix it up and do some variation such as a walk, lope, trot, walk, trot, walk, etc. Only progress in speed when your horse is ready for it and honoring the speed you ask for and staying reasonably relaxed. We don’t want them to associate the Heel-o-matic, or roping in general with being emotional, tense and chargey.
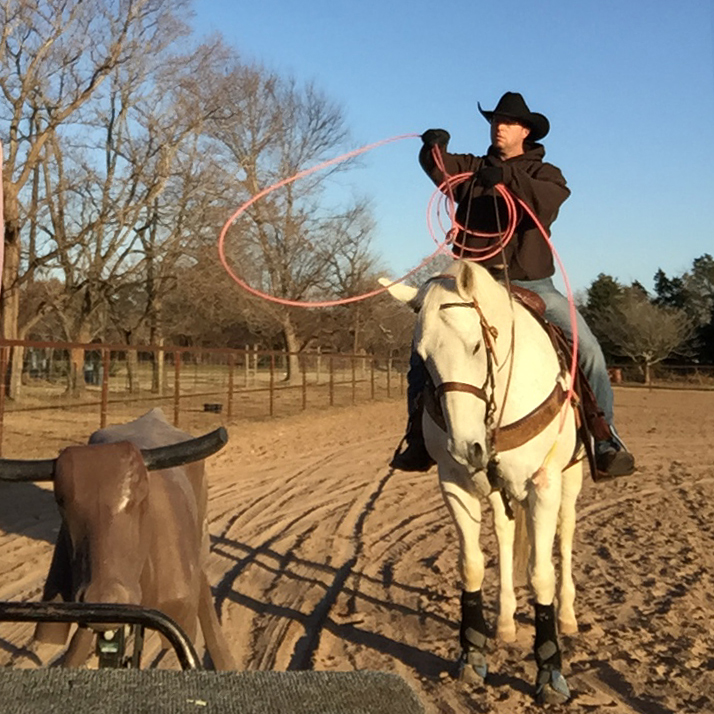
Drill #3 to Improve ROPING FUNDAMENTALS
Although roping a dummy on foot has its benefits, it doesn’t fully replicate roping on horseback.
Roping the Heel-o-Matic is a great way to solidify our own fundamentals in a more realistically simulated way, and as I’ve mentioned – and offers us some key advantages versus live steers.
One advantage is that we get correct and consistent throws over and over to really train and solidify our muscle memory. This allows us to ensure our rope angles are correct, we follow through on our delivery, our timing is spot on, and our dallying is sharp.
Another advantage a Heel-O-Matic gives us is the ability to speed up the learning curve in trying new techniques to promote growth in our roping. There are basic fundamentals build a solid foundation for our roping, but if we are not evolving with our skills, we will have less trips to the pay window.
An example of this would be for a header to expand their range (being able to throw more coils). This can be difficult to learn on live steers since they are sometimes unpredictable in their direction and speed. However, learning this new skill on the Heel-O-Matic is easier since we can slow down the run and focus on the specific changes in our swing and delivery.
Some other specific aspects of your roping you might focus on are:
1. Steer Patterns (left or right)
2. Scoring
3. Different Loop Sizes
4. Different Hand Placement on our Loop (more or less spoke)
Just because we’re learning new techniques to speed up our run doesn’t mean we have to make every run at full speed. Again, we are looking for repetition to solidify these new positive habits, and the repetition doesn’t have to be done at high speed to do that and actually dramatically increase our speed in a run.
Don’t forget to video your practices even when using the Heel-o-Matic. It could be from someone else videoing on their phone, or from you using a Go Pro camera. My wife recently bought a Pivo iPhone mount that follows your horse and can be set on a tripod or even a fence post or another object – no camera man required. We can learn a lot from watching videos and critiquing them. It’s easy to set up a video camera or ask someone to film, but it’s also easy not to. Having that footage to study is an easy way to give yourself an advantage.
Heel-O-Matic roping sleds are one of the best investments you can make for yourself, your horses and your roping. It takes each of us doing our best and working as a team to be successful, and with the quality practice from Heel-o-Matic roping sleds you and your horse will be at the top of your game quicker and at the winner’s circle more often.
To choose the perfect Heel-o-matic roping sled for you, visit Heel-o-Matic.com.